


I still remember my last cable bill—$167 for the privilege of watching maybe six channels I actually cared about. That moment led me down the IPTV rabbit hole, and three years later, I’ve never looked back.
If you’re hearing about IPTV everywhere but haven’t made the switch yet, this guide is for you. I’ll walk you through exactly what IPTV is, how it works, and how to get started—without the confusion or technical jargon that usually comes with it.
What Exactly Is IPTV? (The Simple Version)
IPTV stands for Internet Protocol Television. That’s a fancy way of saying “TV delivered over your internet connection instead of through cables or satellites.”
Here’s the easiest way to think about it: Remember when Netflix replaced DVD rentals? IPTV does the same thing for live TV channels. Instead of waiting for a cable technician to drill holes in your walls, you simply connect to the internet and start watching.
When you watch a channel on cable, the signal travels through underground cables to your box at all times—wasting massive bandwidth. With IPTV, your device only requests the specific channel you want to watch, and the server sends exactly that stream. It’s request-based, not broadcast-based.
In plain English: IPTV is live television streamed over the internet, giving you thousands of channels at a fraction of cable prices—typically $10-20 per month versus $80-150.
How Does IPTV Actually Work?
Understanding the technical side helps you troubleshoot issues later. Here’s the pipeline:
Step 1: Content Acquisition
IPTV providers gather channels from satellites and broadcasters using licensed agreements.
Step 2: Encoding
Raw video gets converted into digital packets using codecs like H.264 (for HD) or H.265 (for 4K)—this compression makes streaming possible over standard internet connections.
Step 3: Server Processing
Encoded content gets stored on provider servers, often using Content Delivery Networks (CDNs) to place streams closer to users geographically—reducing buffering.
Step 4: Transmission
When you click a channel, your device sends a request to the server, which streams the content through your internet connection in real-time.
Step 5: Playback
Your device (Firestick, Smart TV, phone) decodes the packets and displays the video.
The entire process happens in milliseconds. You don’t notice any of this—you just watch TV.
Types of IPTV Services
Not all IPTV is created equal. Here’s what you’ll encounter:
Live IPTV
This replaces traditional cable—watching channels in real-time as they broadcast. Sports, news, you name it. This is what most people want.
Video on Demand (VOD)
Libraries of movies and shows you can watch anytime. Think Netflix-style, but often much larger selections.
Time-Shifted TV
Recording live shows to watch later—some providers include cloud DVR features or catch-up TV (typically 24-72 hours).
Most paid subscriptions include all three. Free or ultra-cheap services often skimp on VOD and catch-up features.
What Do You Need to Get Started?
Here’s the surprisingly short list:
Internet Speed
- HD streaming: 25 Mbps minimum
- 4K streaming: 50 Mbps recommended
- Multiple devices: Consider 100 Mbps
A Device
IPTV works on almost anything with internet access:
- Amazon Fire TV Stick / Fire TV
- Android Smart TVs (Samsung, LG, Sony)
- Apple TV
- Roku
- Android or iOS phones/tablets
- Windows or Mac computers
- MAG boxes (dedicated IPTV hardware)
- Nvidia Shield
An IPTV App
Popular options include:
- IPTV Smarters Pro (beginner-friendly)
- TiviMate (more features, requires subscription for some features)
- VLC Media Player (computer-based testing)
Credentials
Your provider gives you either:
- Xtream Codes login (username + password + server URL), or
- An M3U playlist URL
That’s it. No technician, no installation appointment, no contracts.
Step-by-Step Setup: From Zero to Watching
Here’s how to go from “never used IPTV” to “watching your first channel” in about 15 minutes:
Step 1: Test Your Internet
Run a speed test at Speedtest.net. Make sure you have 25+ Mbps for HD. If your WiFi is slow, consider wired Ethernet.
Step 2: Choose Your Device
A Fire TV Stick 4K ($40-50) is the most common beginner choice. It works perfectly with most IPTV apps and plugs directly into your TV.
Step 3: Enable App Installation
On Firestick: Go to Settings > My Fire TV > Developer Options > Enable “Install unknown apps” (this allows apps outside the Amazon store).
Step 4: Install Downloader
Search “Downloader” in the Amazon App Store and install it. This app lets you install IPTV player apps.
Step 5: Download Your IPTV App
Enter the provider-specific URL in Downloader (your IPTV service should provide this). For example, to get IPTV Smarters Pro, you’d enter the URL they specify.
Step 6: Enter Credentials
Open the app, choose “Login with Xtream Codes,” and enter your username, password, and server URL.
Step 7: Start Watching
Browse channels, pick one, and enjoy. Test during peak evening hours (7-11 PM) to ensure stability before committing.
Pros and Cons: The Honest Assessment
Why People Love IPTV
- Massive savings: $10-20/month versus $100+ for cable
- Insane channel selection: 20,000+ channels versus 200-300 on cable
- No contracts: Month-to-month flexibility
- Watch anywhere: Phone, tablet, laptop, TV—all included
- On-demand libraries: Thousands of movies and shows included
- DIY setup: No technician, no waiting
The Real Challenges
- Internet required: No internet means no TV—period
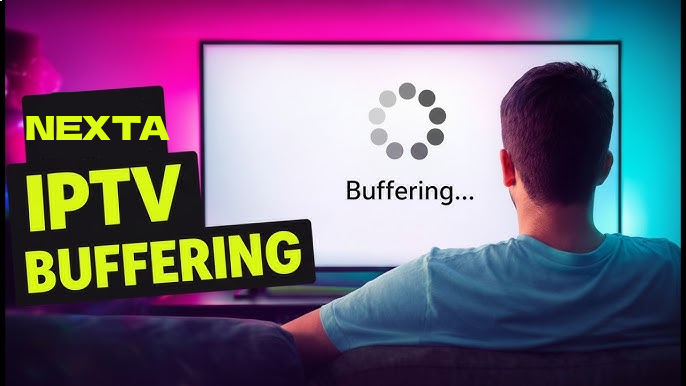
- Quality varies: Some providers buffer more than others
- Technical know-how needed: Initial setup requires some comfort with apps
- EPG inconsistencies: Program guides sometimes have errors
- Provider reliability: Some services disappear without warning
- Legal gray areas: Some providers operate without proper licensing
Tips Based on My Experience (Save Yourself Trouble)
- Always use the free trial first. Test during prime time (weeknights 7-11 PM, weekends). This reveals real-world stability better than any review.
- Don’t chase channel count. A provider with 50,000 channels means nothing if they’re all dead. Focus on channels you actually watch.
- Use Ethernet when possible. WiFi works, but wired connections eliminate buffering caused by signal interference.
- Keep a backup plan. I pay for a $5/month secondary provider as insurance for movie nights when my main service has issues.
- Never pay for more than 3 months upfront. Providers do disappear. Annual plans save money, but they also carry more risk.
- Check server locations. If you’re in the US and the provider’s servers are in Europe, expect latency. Look for providers with US or regional servers.
Legal Questions: What You Need to Know
Here’s the truth: IPTV technology itself is 100% legal. It’s a delivery method, like cable or satellite—just different infrastructure.
What determines legality is whether your provider has proper licensing for the content they distribute. Licensed providers operate similarly to YouTube TV or Sling TV—legal and transparent. Unlicensed providers stream copyrighted content without permission—which is illegal.
How to stay safe:
- Use reputable, well-reviewed providers
- Avoid services with unrealistic pricing ($5/month for 20,000 channels? Really?)
- Look for providers willing to explain their licensing
- Consider a VPN for additional privacy
Frequently Asked Questions
How much internet data does IPTV use?
Approximately 1-3 GB per hour for HD, 5-8 GB for 4K. If you watch 4 hours daily at HD, that’s roughly 120-240 GB monthly. Most unlimited data plans handle this easily.
Can I watch IPTV on multiple devices at once?
That depends on your provider. Most allow 1-3 simultaneous streams. Budget providers often limit to one. Check before subscribing if you have a multi-viewer household.
What’s the difference between Xtream Codes and M3U?
Xtream Codes is a login system—username, password, and server URL. It handles account verification and channel lists automatically. M3U is a playlist file containing direct channel links. Both work; Xtream Codes is easier for beginners.
What if my provider goes out of business?
This happens. That’s why I never recommend paying for more than 6 months at a time. Keep your M3U playlist backed up—you may be able to use it with a different player if circumstances change.
My Final Thoughts
After three years of using IPTV, I’ve saved over $4,000 compared to keeping cable. The experience isn’t perfect—there’s occasionally a buffering issue or an obscure channel that doesn’t work—but the value proposition is undeniable.
The key is choosing the right provider and having realistic expectations. It’s not cable-level reliability at cable-level prices. But for under $20/month to access what you’d pay $100+ for otherwise, IPTV makes sense for most cord-cutters in 2026.
Start with a trial, test during peak hours, and don’t commit to anything long-term until you’ve verified the service works for your viewing habits.
IPTV Guide Rating
| Category | Rating | Notes |
|---|---|---|
| Setup Difficulty | ★★☆☆☆ | 15 minutes, very doable |
| Cost Savings | ★★★★★ | $80-150/month savings |
| Channel Selection | ★★★★★ | 20,000+ vs cable’s 200-300 |
| Reliability | ★★★☆☆ | Depends heavily on provider |
| Flexibility | ★★★★★ | Watch on any device |
Overall: ★★★★☆ — The best cord-cutting option if you value variety and savings over perfect reliability.
Meta Title: IPTV Guide for Beginners (2026) – Complete Starter Guide
Meta Description: What is IPTV, how it works, and how to set it up. Complete 2026 beginner’s guide covering devices, apps, providers, and tips.
Internal Link: https://nextappszone.com/
Sources Referenced: